Thursday, February 17, 2011


Wednesday, December 15, 2010
Layout Therapy
“Legs tangled tight, wrap me up in a DREAM with You…”

The TAG: Believe it or not but the base of the tag is from a light bulb package (I find scrapbooking supplies everywhere :) and is 
My JOURNALING: I did the first draft of my journaling on a 
DETAILS: The majority of the letters on this layout were stamped on. I like the look of different fonts and letter styles, especially on a page where the text is a main feature. I also added a leafy floral rub-on to create a bridge between the bright picture and background paper. Lastly, I want to mention that some of my ideas for this layout came from the cover of the November/December 2010 issue of Creating Keepsakes – love the layering of papers and the use of ribbon to create outlines!
Here is the original ‘Legs Tangled Tight…’ layout which I made sometime in 2004. The paper was a big inspiration to me in this layout also and I kept it simple so that the picture and words would be the focal points.


Tuesday, November 16, 2010
Count your Blessings, 1.2.3...


3. Amazing Photographer
4. Time
...to be continued
Cake, Cupcakes & Cookies...
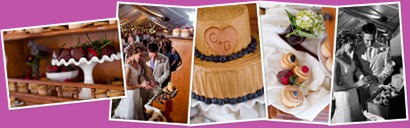
{some of the *sweet* stuff we served for dessert at our wedding}
I must admit that the cake was not on the top of my priority list but it was something I wanted to be crafty and unique. I’m not a huge fan of traditional wedding cakes and displays but I had NO IDEA of what I wanted… until I consulted my super duper dessert expert friend, Lydia from Elle Cee’s Cake Boutique (she’s amazing!). Lydia opened up a whole new ‘dessert table’ perspective for me and she helped me realize that the dessert can be as personal as any other part of the wedding. So, after doing a little online searching (the magazines are all so repetitive…) I really liked Amy Atlas’ ideas and the idea that half the success of a good cake/dessert table is finding the right way to display the yummy sweets.
This leads us to my next point. Once I realized all this about the dessert table, I somehow came up with the idea to use my parent’s old kitchen hutch. It had been in the house I grew up in and seemed like such a great personal touch. My dad thought I had crossed over into crazy bride land but he later realized what a great idea it was! We dug the hutch out of storage and it was a perfect fit for our little hometown, rustic celebration.
Wow, I didn’t realize how much I had to say about wedding desserts… but I will keep typing b/c it’s so fun to reminisce. Since I am a HUGE advocate for eating candy and sweets, I liked the idea of offering a variety of goodies, especially since I only wanted a very small, simple cake. We had our family friend, Kelly Hansen, make the desserts and she was so great to work with. I think I finally decided on the cake design about a week before the wedding, eek, but she was very patient with me. As you can see in the pics above, the cake is super simple but it totally fit my vision (and I would include Chase’s ‘vision’ in this but he’ll even admit that he didn’t care about the cake). Instead of a cake topper we had Kelly make a heart out of fondant with our initials which matched some of the homemade wood signs we used to decorate the road. The cake filling and cupcakes were stuffed with berries which was from a cake recipe that Chase’s mom gave me (omg, yum!). Of course we had to have chocolate covered strawberries since Driscolls is one of the only (and best!) companies that has special, extra grande berries for dipping.
I think cutting the cake was a turning point for me in the night. I had been a little overwhelmed by sticking to the timeline and all the attention so when we finally got up from the head table to walk over to the cake hutch I realized that it was time to start having fun! We had a sweet cake cutting… I seriously threatened Chase before the wedding to absolutely NOT shove cake in my face and he listened (another reason why I love him so much!). The cutest part though was at the very end when Chase licked the cake cutting knife! I made sure no one used it to cut the cake after that… oh well, it was our wedding, he should be able to lick the knife if he wants. I wouldn’t change a thing about our dessert table or the way we cut the cake… but I would do it again if I could!
A little bridely advice about the stuff that goes with the sweets ---Cake toppers don’t have to be limited to two little people but can be something super personal. Check out Etsy for some neat ideas. And don’t forget to find a cake serving set… it’s traditional to have your names and wedding date engraved on the serving utensil but again, you can do whatever seems best for you and your new spouse to be. That’s all the *sweet* talk I got for you tonight.
Sunday, October 24, 2010
We Have Style!
Fun news – our wedding is featured on www.styleunveiled.com.  Yeah! Of course I think this is super cool because I like that others will be able to see some of the unique details from our special day. I hope other brides (and grooms) can use our 'real wedding' to get ideas for their wedding. Happy viewing!

Monday, October 4, 2010
Long time no blog...
 fast my days pass me by now. Starting this week, it's my goal to get bloggin' again.
So, I'm into my early college years and here's a little collage of my 'Dorm Life'. I started it a few weeks ago when I was at a crop night and I finally finished it last night by adding the title, some white brads and a little black ink bordering. I loved the yellow, flower patterned paper and used the orange corrugated paper to add texture. I feel like there is something missing, maybe an extra embellishment, but with the large pictures I was afraid the page would get too busy. I want to start adding rustic, creative embellishments and accents to my layouts. Happy Crafting...
Tuesday, August 17, 2010
 grow fonder!

My wonderful husband is away this week on a business trip to New York and I miss him. Sometimes if feels good to get a little alone time but a whole week without him makes me realize just how much I love being with him. I spend my days looking 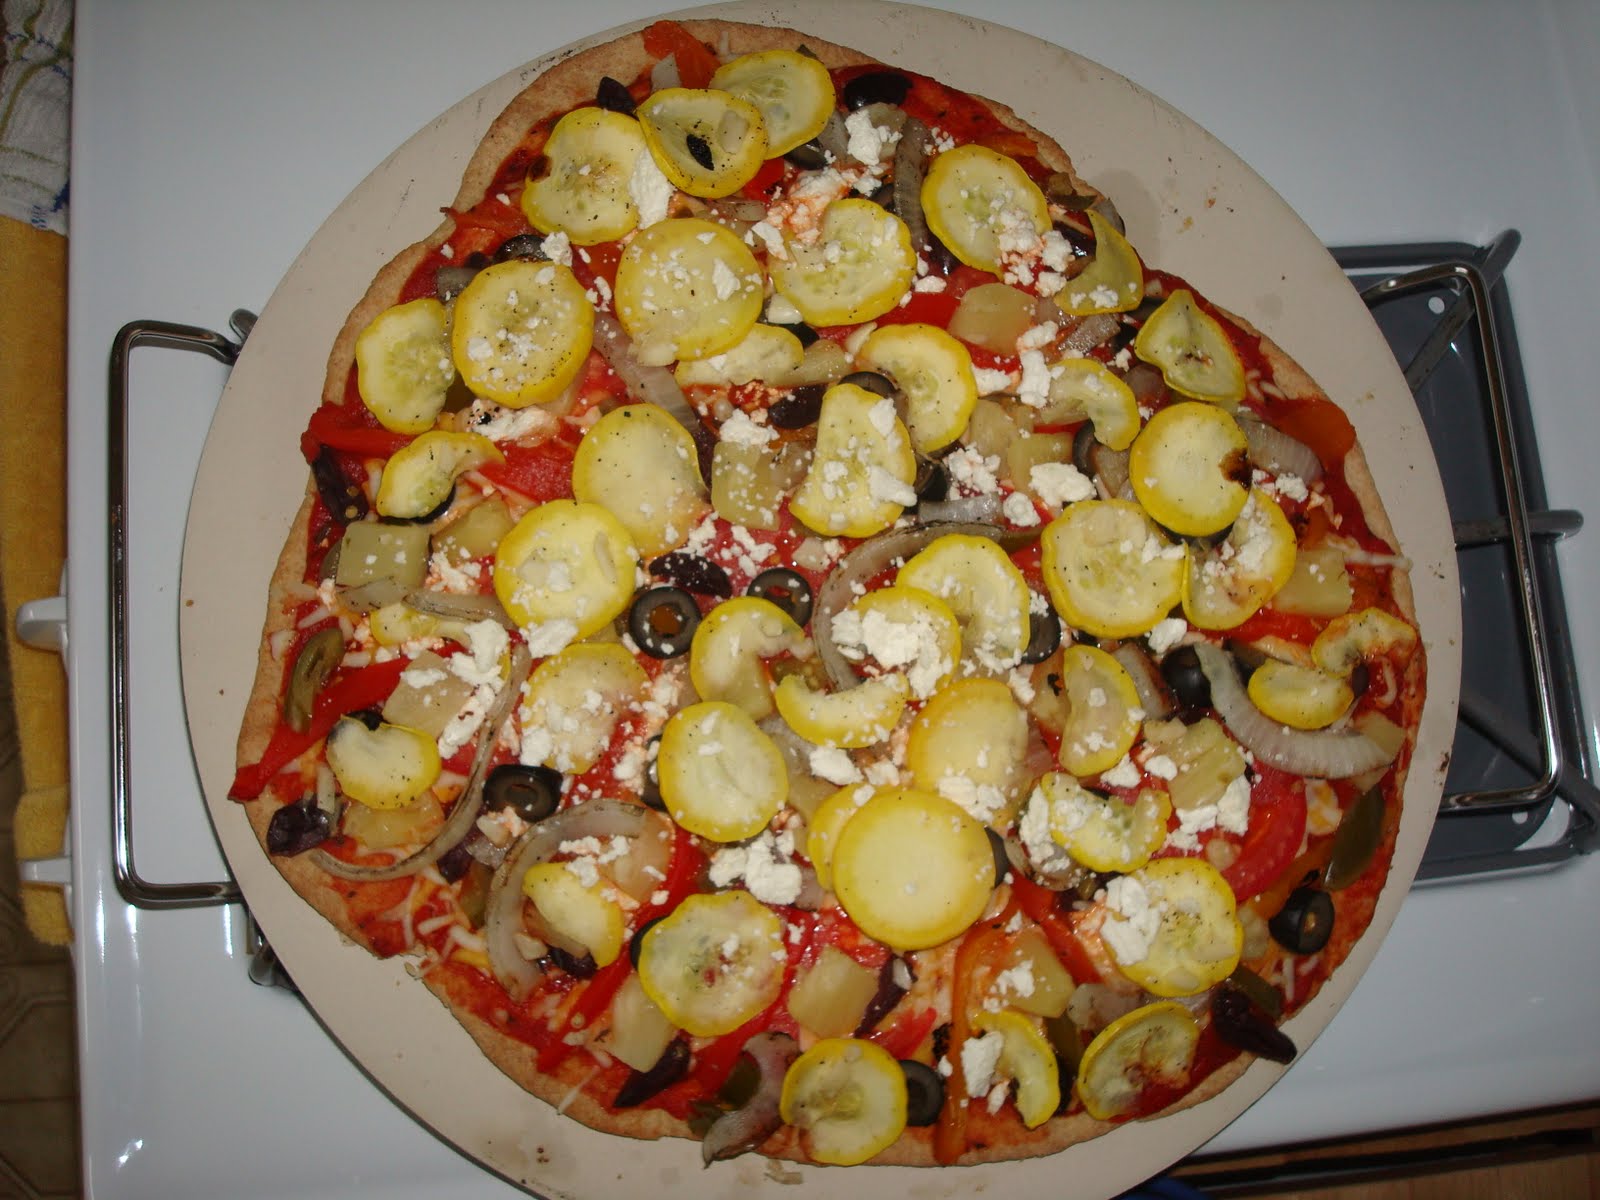 forward to him coming home from work, making dinner with him (like yummy homemade pizza), and watching our favorite reality cooking shows... Chopped, Next Food Star Network & Hell's Kitchen.
Now that we're married, we are often asked, "How's the married life?" and it really is great! I love being with my husband and my favorite part of everyday is when I get to cuddle with him as we fall asleep. Oh how I miss him!
Monday, August 16, 2010
Rehearsal Dinner Invitations
I love making invitations for special events especially when it involves weddings! Last week I put t
 ogether the invitations for my cousin's wedding rehearsal and rehearsal dinner.
STEP 1: The Sketch
I started the sketch after going to the craft store and picking up some paper and stamps. I wanted to use cardstock for the background, print the text, add a couple of embossed stamps in the middle and decorate with patterned paper.
STEP 2: Trial and Error
I put the text together and did a few practice prints to make sure the spacing was correct. I ended up using less stamps than originally planned because I was afraid it would be tough to wrap the text around the stamps. Looking back, I think I would've been more daring and stuck to my original idea.
 STEP 4: Pass 'Em On
Wednesday, July 28, 2010
Thank You Notes
I started worrying that I've missed the proper time slot to thank our guests so I looked on a few websites to see what the etiquette is for sending thank yous following the wedding. According to the websites, it looks like I have about two more weeks to get them out. While we all would agree that the notes should be sent out as quickly as possible, About.com advises that the "notes should be sent within three months of receipt of gifts on formal stationary." As for The Pink Book, it states that thank you notes should be handwritten and sent within two months of the date that the gift is received. Lastly, Thank You Note Samples explains that wedding gifts "should be acknowledged within two months of your return from your honeymoon."

I actually like writing the thank you notes because it gives me a chance to reflect on the memories I have of each guest at our wedding and how they have shown their support and love. Now that I have answered this question of etiquette, I better find some pens and get writing!
Ultimately, my final advice on sending wedding thank you notes is:
1. Use the list you created when opening your gifts and remember to keep track of who you've sent cards to so that you don't forget any guests
2. Hand write your notes and keep them personal
3. Mail them within 3 months of the wedding date
4. Send Thank You Notes to all guests that attended (whether you received a gift or not)
5. Try to keep the stationary formal... but I really like the picture cards too!
A few more words on the Thank You cards we chose... I ordered the thank you cards before the wedding from Sealed with a Kiss, the same company we ordered our invitations from. We chose a simple, monogrammed white card that will be great stationary once we're done using them as wedding thank yous. I also ordered return address labels to use on the envelopes... the first thing I bought with our new name :)
A little more scrapbook therapy

Monday, July 26, 2010
Janell's Bridal Shower Invitations
 My fav cuz is getting married in September and next month her bridesmaids are throwing her a very royal bridal shower. She loves pink and zebra so it's only fitting that's what I put on the 75 invitations I made for this very special party.

Interested in ordering handmade invitations? Just email me with the type of event, quantity needed and any special requests. Email: somethingpurpleplanning@gmail.com
Tuesday, July 20, 2010
Wedding Gifts

My Favorite: My new Dyson vacuum from Mom & Dad Renois... greatest vacuum ever!
 But a close 2nd is the new juicer from Alice and Luis

Our Favorites---
Most Thoughtful: Gift card to the Ritz-Carlton from Britt and Nishan... we know where we're going to celebrate our 1 year anniversary :)
Sexiest: Stripper pole from my cousin Laura... seriously, she gave us a stripper pole!
Yummiest: Snickers, Lindt chocolates and peanut butter M&Ms from the Corzine family
Handmade: A precious green and purple quilt from Monica
Personalized: 'R' wine glasses from Val & Aaron... the first batch we received had a broken glass so instead of exchanging them, Pottery Barn sent us a whole new set so now we have 11 personalized white wine glasses... the more the merrier, right?


Biggest Upgrades: *Absolutely the towels from the Tassey family, Eric & Tammy and KJ & Clint - we were still using the towels Chase got for his birthday from his mom when we were in college *The Oneida silverware from the Donohoe family - we were using an old set that I had inherited when I moved into a new place after my sophmore year of college *Last but not least is the drain stopper - we don't have a garbage disposal and we were in desperate need of a new sink stopper... guess it's a good thing we got about five of these goodies (from Target).
Gift Giving Advice for Guests-- Buy stuff off the couple's registry lists and if you can't do that then give gift cards. Also, put the card on the inside of the gift wrap or tape the card to the gift like it's going to be dropped out of an airplane - otherwise, the bride and groom might be giving someone else the credit for your gift... which reminds me, who gave us the steam mop? I love it so thanks!
Gift Advice for the Bride and Groom-- As you open your gifts, make a list of everything you receive and who it's from so you know what to write in your thank you cards.
Thursday, July 15, 2010
Wedding 'Bible'


Wednesday, July 14, 2010
A little scrapbook therapy


On my scrapbook table right now - Getting my wisdom teeth pulled! Look for the layout later this week.
Sunday, July 11, 2010
Save the Dates!
We sent our Save the Dates out shortly after the 2009 holidays so our guests received them about 4 1/2 months before the big day. I know all the wedding timelines say that StDs are supposed to go out 6-8 months before the wedding but it definitely took longer than we had anticipated to get them designed and collect all the addresses. We used our engagement photos from our first shoot for the front of the postcards which were designed by Sophie from the Mike Larson Team. We mailed them as postcards, without envelopes, and I used some silly polar bear stamps (the only 28 cent stamps I could get at the Watsonville post office). We ran into some problems with writing on the back because the glossy finish would not allow any inks to dry on it so... I had to print all the addresses on clear labels which took a little longer than I wanted. In the end, I think they turned out great and I love the idea of sending out Save the Dates so guests can get one more taste of the bride and groom's personsalities.


Quick Tips for SAVE the DATES: 1. Start on guest list asap and start collecting guest addresses 2. Put a return address on StDs so if they find their way back to you - you know you have the wrong address 3. Stamps for postcards are only 28 cents (vs. 44) 4. The cutesy wedding stamps are hard to find at the post office but you can find them online at http://www.zazzle.com/, just remember that these can be $$
Friday, July 9, 2010
New Name.New License
Wednesday, June 30, 2010
I'm Embossing!
 Now that I'm getting more involved in card making and all the scrapbooking magazines have great ideas for embossing, I took my weekly coupon to Michael's and bought a Martha Stewart heat gun and embossing kit. The kit includes three embossing powders, embossing stamp pad and stamping block.
I'm in love with trying to emboss cards and using different stamps but I still need to practice how much embossing ink to use and how to keep the process clean. I'm hoping to get an embossing pen (if it even exists) so I can use it to add small embossed accents.
The card, right, started with a pre-made card that has a floral print on the paper and is blank inside. The accent is a piece of tan, rustic paper layered with white vellum. The vellum is stamped with the bird using a green embossing powder and accented with silver deco ink. I added some light blue rafia which I accented with staples and added an 'xoxo' embellishment. This card would be great to give to a loved one, family member or friend.
Check out the Heat Gun - http://shop.marthastewart.com/Martha-Stewart-Tools-Heating-Tool/A/B002YIO854.htm
Thursday, June 17, 2010
Time to Blog!
Where do I start? Here's my first mission... during the wedding planning process, I had hoped that I would journal about all the emotions, planning details, reactions, up/downs, etc. as they happened but I didn't :( So, before I forget about all of the 'little' stuff, I'm going to blog about it, in detail, from start to finish. I can start with this - I absolutely loved planning our wedding! It has made me realize some of my passions for event planning and crafts, and I hope to build this blog into a site for other brides to get ideas, help, or relief in knowing that all the stress, chaos, excitement, anxiety... is part of the process so enjoy it!


 Getting ready for my bridal shower & I know THANK YOU cards will be a must!


